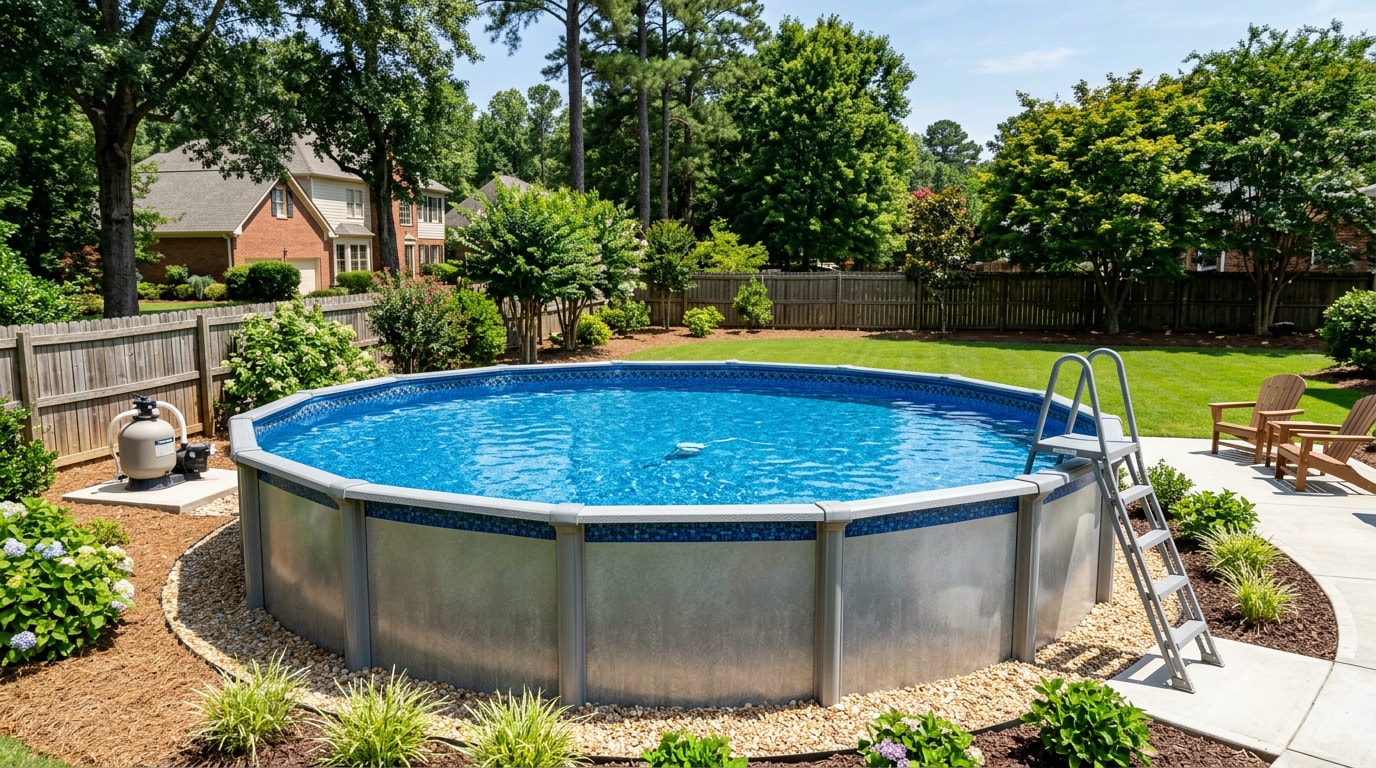
Above ground pool liner installation in Marietta, GA gets trickier once Georgia's humidity and UV exposure start working against vinyl every summer. A liner that fails in July means a drained pool during the hottest stretch of the year, plus a scramble to find an installer with open scheduling. This guide covers the warning signs, the liner types available, what installation actually costs in this market, and whether your project is a weekend DIY job or one to hand off to a pro.
This guide is maintained by the pool crew at Southern Life, who handle liner replacements and broader pool and hot tub service calls across Cobb County, including the field notes below from actual Marietta backyards.
Signs That Your Pool Liner Needs Replacement
Catching liner failure early is the difference between a quick patch job and an emergency drain-and-replace scenario. Most Marietta pool owners miss the early signals because they look cosmetic rather than urgent. Here's what to watch for before the problem forces your hand.
Structural Damage and Material Failure
A pool liner needs replacement when damage moves from isolated and patchable to widespread and structural. Small punctures from sharp objects occasionally permit temporary patch repairs using vinyl adhesive kits, but multiple damage locations, extensive cracking patterns, or tears longer than a few inches signal systemic material exhaustion.
If you've noticed a slow drop in water level, don't assume it's just evaporation. A leak often traces back to a liner puncture that didn't hold, or a seam starting to separate under water pressure. A single clean puncture repair can buy you time, but vinyl liner failure rarely stays isolated once the material itself has degraded.
Progressive Color Degradation and Pattern Loss
Fading and chalking are a different failure mode than tears, and they creep up slowly instead of announcing themselves all at once. Prolonged ultraviolet exposure systematically breaks down vinyl polymer chains, causing progressive color fading, pattern deterioration, and surface chalking. Minor discoloration remains primarily cosmetic during early stages.
Severe bleaching, though, indicates advanced material breakdown that compromises waterproofing capability and structural strength. A faded liner that's gone chalky to the touch is losing flexibility, not just color. In our own service calls around Marietta, liners on pools facing full southern sun tend to show visible chalking two to three summers earlier than liners in shadier Atlanta-area backyards, so lot orientation matters as much as liner grade.
What Are the Main Types of Above-Ground Swimming Pool Liner Beads?
Before you can get an accurate quote, or attempt the job yourself, you need to know which attachment style your pool currently uses. This determines which replacement liners are compatible and how the installation actually happens.
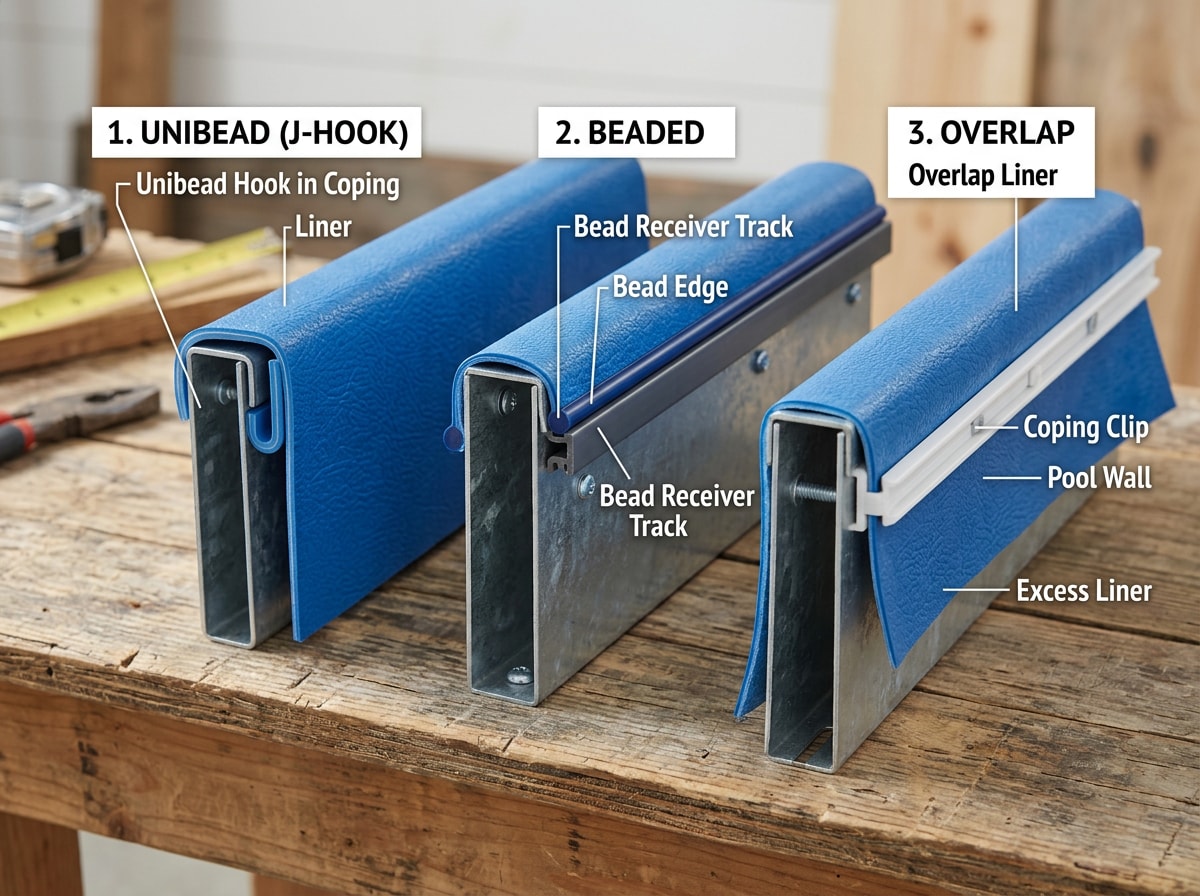
Unibead Pool Liners
Unibead liners are designed to be versatile, built to work either as a J-hook liner or with a bead receiver, which makes this style one of the more forgiving options if you're unsure exactly what your pool wall currently supports. Because a universal bead liner adapts to multiple attachment styles, it's become a popular upgrade choice for homeowners replacing an older overlap-style liner without changing their top rail hardware.
Beaded Pool Liners
These are among the easiest liners to replace and are available in a wide range of designs. The bead receiver hangs over the top of the above-ground pool wall, and the liner snaps into the receiver so you get a consistent, finished look around the entire pool. A beaded pool liner also simplifies future track maintenance, since there's no coping strip or top-rail removal required just to inspect the attachment point.
Choosing the Right Liner
The type of liner you choose usually comes down to weighing upfront cost against installation speed.
- Overlap liners are the most budget-friendly option, but require removing the top rail and coping strips.
- Beaded liners are easier and quicker to install since they skip the rail removal step entirely.
- Unibead liners give you flexibility to switch attachment styles without new hardware.
When comparing overlap vs. beaded options, the overlap route saves money at purchase, while beaded and unibead styles save labor time, a tradeoff worth discussing with whoever's doing the install.
Material Choices for Pool Liners
Vinyl remains the standard material because it balances cost-effectiveness with straightforward installation. Within vinyl, mil thickness is the real variable that determines how long your investment lasts. Vinyl is also a wear item by design; even the thickest grades eventually need replacement, since the liner is a "wear item" that will not last forever, and will need to be replaced every 7 to 15 years , according to one national vinyl liner guide.
Here's how the common thicknesses stack up for the Marietta/Cobb County market, where UV exposure and pool usage both run on the higher end:
| Mil Thickness | Expected Lifespan | Puncture Resistance | Typical Installed Cost (Marietta area) |
|---|---|---|---|
| 20 mil | 6-8 years | Moderate | $900-$1,400 |
| 25 mil | 8-10 years | Good | $1,200-$1,800 |
| 30 mil | 10-15 years | Best | $1,500-$2,200 |
These figures are general ranges and will shift based on pool size, liner pattern, and labor rates at the time of your project. Treat them as a starting point for budgeting conversations, not a fixed quote. The 20 mil vs. 30 mil decision often comes down to how long you plan to keep the pool and how much upfront cost you're comfortable absorbing.
If a liner failure led to a bigger repair than you expected, our pool repair and renovation page covers what else to check before you close the project back up.
Essential Pre-Installation Preparation
Picking the right liner is only half the equation. Timing and tools determine whether the install goes smoothly or turns into a wrinkled, frustrating afternoon.
Optimal Timing Selection
Above ground pool liner installation works best in warm temperatures, ideally 80 degrees or warmer, since vinyl stretches more easily and conforms to the pool walls without cracking. For Marietta homeowners, that realistically means late spring through early fall. Cold vinyl is stiffer and more prone to tearing during placement, so scheduling around Georgia's warmer months isn't strictly required, but it meaningfully reduces installation risk.
Comprehensive Tool and Material Assembly
Before the old liner comes out, get everything staged on-site. The right tools prevent mid-job delays and reduce the odds of damaging the new liner during setup.
A basic checklist includes:
- Wet/dry shop vac for setting the liner
- Duct tape for sealing skimmer and return openings
- Pool sand or foam liner pad for the floor base
- Utility knife for trimming excess material
- Replacement gaskets for skimmer and return faceplates
Skipping the liner pad step is one of the most common DIY mistakes. It's what protects the new liner from rocks, roots, and uneven spots in the base underneath it.
Step-by-Step Guide to Installing a Swimming Pool Liner
Whether you're doing this yourself or watching a hired crew work, the sequence stays the same: remove, position, and set. Here's what actually happens on install day.
Remove the Old Liner
For overlap liners, you may need to remove the top rail and coping strips, while beaded and unibead liners can simply be lifted off the wall. Either way, start by detaching the skimmer and return faceplates so the old liner comes free without tearing the fittings. Removing the old liner carefully also gives you a chance to inspect the wall and base underneath for damage that needs addressing before the new liner goes in.
Position the Liner in the Pool
Removing all top rails exposes the bare pool walls. From there, the liner is unfolded and centered in the middle of the pool, spread evenly while ignoring the seams. The liner won't reach the pool wall all the way at first, and that's normal. Getting placement right at this stage prevents uneven stretching later, since shifting the liner after the vacuum starts pulling is much harder.
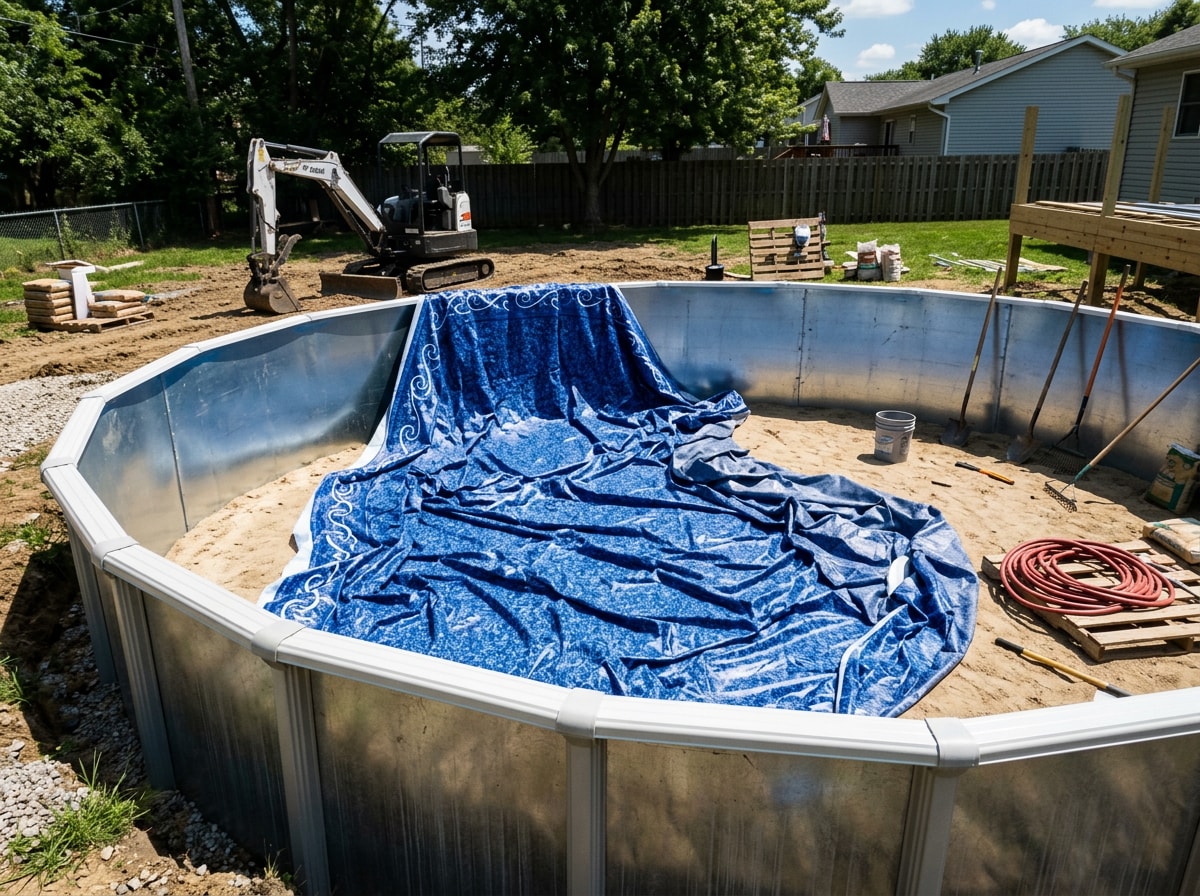
Use a Shop Vac to Set the Liner
Add your shop vac to the open skimmer hole and push the vac hose down to the sand. Duct tape the open space at the skimmer and return jet for an airtight seal, and plug the vac into a safe, GFCI-protected outlet. This step matters for more than convenience: federal safety guidance on pool equipment notes that electrical equipment should be installed by a licensed electrician in accordance with local safety codes, and ground-fault circuit interrupters are now recommended for pool area installations .
This shop vac method pulls the vinyl snugly against the walls and floor before water goes in, which is the key to a wrinkle-free liner. Run the vacuum as you start filling the pool with a garden hose, and the suction will draw the liner tight as the water weight settles it into place.
DIY vs. Professional Installation
DIY might save you money upfront, but professional installation generally guarantees a cleaner, wrinkle-free, leak-free result, especially on larger or more complex pools. Which way you lean should depend on your pool's size and your own comfort level with the process.
For large oval pools (18x33 feet or bigger), deep-end configurations, or any job where you don't have a second set of hands, hiring a pro is usually the safer call. These setups are harder to position evenly solo, and a wrinkle that sets after filling is expensive to fix. A confident DIYer working with a standard overlap liner on a smaller round pool can often handle the job with a free weekend and a helper.
If you decide to hire an installer in Marietta, check that they carry proper licensing. The State Licensing Board for Residential and Commercial General Contractors was created in 2004 to regulate individuals engaged in construction contracting in Georgia, and it's worth confirming a contractor's standing before signing anything. Professional installation cost typically includes labor, disposal of the old liner, and a workmanship warranty that DIY simply can't match.
Once the new liner is set, staying on top of water chemistry protects your investment. Our guide on how much liquid chlorine to shock a pool in Marietta, GA covers dosing so you don't introduce chemical stress to a brand-new liner in its first weeks. Ongoing care also matters more than most owners expect; our pool and spa maintenance team can keep chemistry balanced after the install so the new liner lasts its full expected lifespan.
Serving Marietta and the surrounding area? See our Marietta, GA service area page for availability, or request a free quote to compare pricing against a DIY approach before committing either way.
Frequently Asked Questions
What is the difference between a beaded and Unibead pool liner?
The main difference is how the liner attaches at the top of the pool wall. A beaded liner has a lip or groove molded into its top edge that snaps directly into a bead receiver, instead of hanging over the wall like an overlap liner. A unibead liner can do either, snapping into a bead receiver or working as a J-hook liner.
What are the three types of pool liners?
There are three types of above-ground vinyl pool liners: beaded, overlap, and unibead. Each attaches to the pool wall differently, and confirming which one your pool uses is the first thing to check before ordering a replacement.
Is it hard to replace an above ground pool liner?
Not technically hard, but it takes time and patience. Getting the liner centered, avoiding wrinkles, and sealing the skimmer correctly all require care, and skipping steps leads to costly redo work.
How much does it cost to replace an above ground pool liner?
Liner material alone often runs $200 to $800 nationally. In the Marietta area, installed cost typically runs $900 to $2,200 depending on mil thickness, pool size, and whether padding and disposal are included. Use the national baseline for material cost only, and request a local quote for an accurate installed price.
How long does it take to install an above ground pool liner?
A straightforward replacement on a standard round pool usually takes a few hours to a full day for an experienced crew. Add time if the base needs regrading, if skimmer or return fittings need replacing, or if the pool is a large oval with a deep end.
What temperature is needed to install a pool liner?
Aim for 80 degrees Fahrenheit or warmer. Vinyl stretches more easily at that temperature and conforms to the pool walls without cracking, which is why most Marietta installs happen between late spring and early fall.